схема и инструкция по устройству системы от IVD.ru
Наверх Перепланировки
Каталог домов
С чего начать ремонт
О проекте
Реклама
Контакты
Facebook
Vkontakte
Odnoklassniki
Instagram
Pinterest
Дизайн и декор
Квартира
Спальня
Кухня
Столовая
Гостиная
Ванная комната, санузел
Прихожая
Детская
Мансарда
Маленькие комнаты
Рабочее место
Гардеробная
Библиотека
Декорирование
Мебель
Аксессуары
Загородный дом
Ландшафт
Системы хранения
Коридор
Уборка
Строительство и ремонт
Фундамент
Кровля
Стены
Окна
Двери и перегородки
Потолок
Балконы и лоджии
Как сделать вентиляцию в погребе: правила и устройство системыВентиляция в подвальном помещении
Каждый из вас, наверное, бывал у бабушки в подвале или погребе, совершая героический поход за баночкой консервации. Вы обращали внимание, что подвал подвалу рознь? Темные и сырые подвалы или погреба были не особо привлекательны, так ведь? А вот сухие и светлые не вызывали ни отвращения, ни страха. Конечно, наши предки не особо заморачивались вопросом – как сделать вентиляцию в погребе. Им достаточно было всего лишь кусок трубы для вытяжки и приоткрытой ляды для обеспечения циркуляции воздуха, чем собственно и ограничивались. А как дела обстоят сейчас? При строительстве нового дома или переоборудовании старого, после покупки на вторичном рынке жилья, по-настоящему рачительный хозяин обязательно уделит особое внимание устройству подвала или погреба. В особенности достижению минимальной влажности, что весьма важно для помещений, находящихся ниже уровня поверхности пола. Сейчас мы не будем говорить о гидростойких материалах и особенностях дренажных конструкций. Речь пойдет об обычной, на первый взгляд, вентиляции. Однако, как правильно сделать ее своими руками, чтобы свести конденсацию влаги в погребе или подвале до минимума, знает далеко не каждый. Посему всем интересующимся как установить подобную вентиляцию, – добро пожаловать на маленький технический ликбез.
Что мы знаем о вентиляции
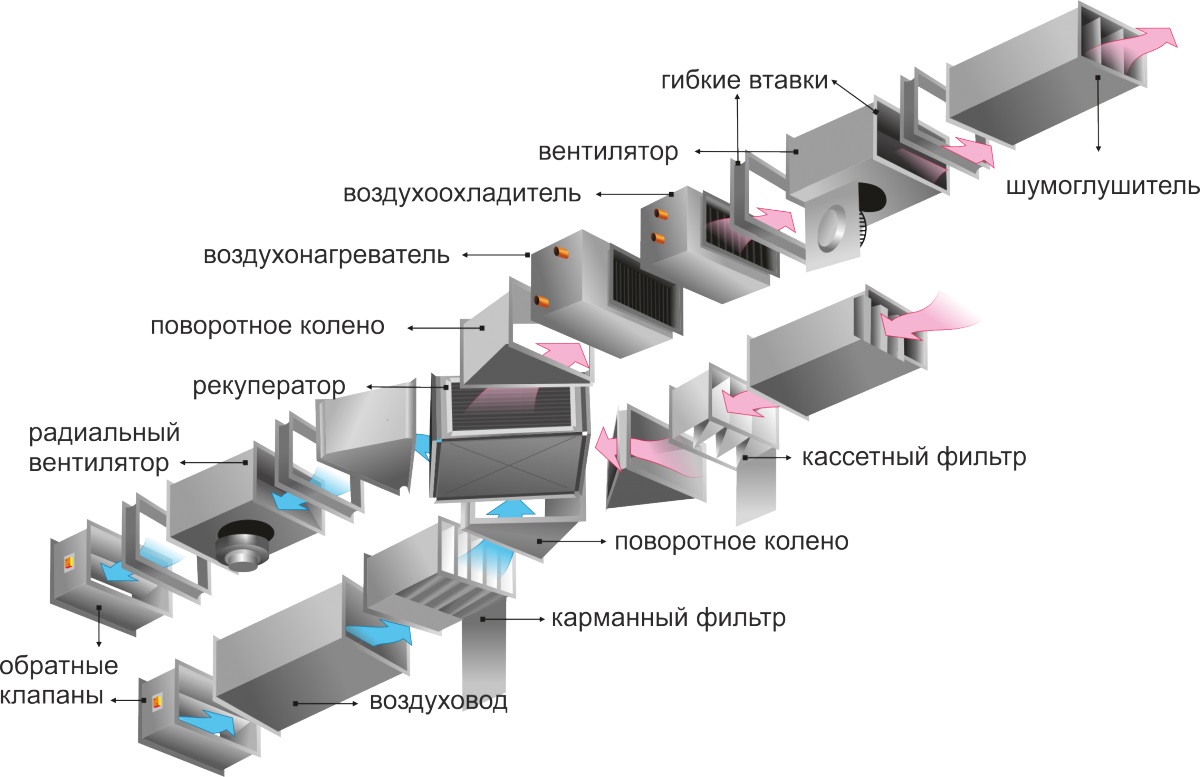
Итак, что мы, собственно, знаем о потоках воздуха? Холодные массы опускаются вниз, а теплые поднимаются вверх, образуя тем самым воздушные потоки, называемые в простонародье «ветер». Ну, как вы понимаете, ветер в прямом смысле этого слова никто в подвальном помещении организовывать не будет. А вот создать (а в техническом плане установить) легкий сквознячок, проветривающий подвал или погреб, не только можно, но и нужно. Обратимся к классической схеме приточно-вытяжной вентиляции.
Варианты устройства вытяжки в погребе
Что нам будет необходимо для правильного устройства вентиляции, давайте перечислим:
Трубы асбоцементные, диаметром 100-150 мм (можно использовать и пластиковые канализационные, это упрощает и облегчает монтаж).
Утеплитель (минеральная вата подойдет как нельзя лучше).
Изоляционный материал (рулонная фольга для систем отопления).
Крепежные элементы.
Защитные элементы (заглушка-сетка и «зонтик» из оцинковки).
Пена монтажная.
Приточно-вытяжная вентиляция погреба
Это, конечно же, не полный перечень используемого материала и приспособлений. Некоторые, особо дотошные, монтируют систему сбора и удаления конденсата, а так же принудительные системы циркуляции. Мы обязательно скажем пару слов об этом, но только после описания классической схемы монтажа вентиляции.
Приточно-вытяжная вентиляция автоматического типа
Выбираем место
Прежде всего, необходимо прикинуть где и как расположить наши воздуховоды, чтобы движение воздуха в подвале или погребе было правильным, т.е. обозначить точки входа и выхода.
Важно!
Запомните – входящий воздуховод (воздухозаборник) всегда ниже выходящего (воздухоотвода) по уровню.
Точки входа и выхода вентиляционной системы погреба
Если говорить проще – вход должен находиться примерно на высоте 300-400 мм от уровня стяжки пола, а выход – ближе к потолку, причем расположены они должны быть в противоположных частях подвального помещения для обеспечения лучшей циркуляции воздуха.
Вентиляционная отдушина
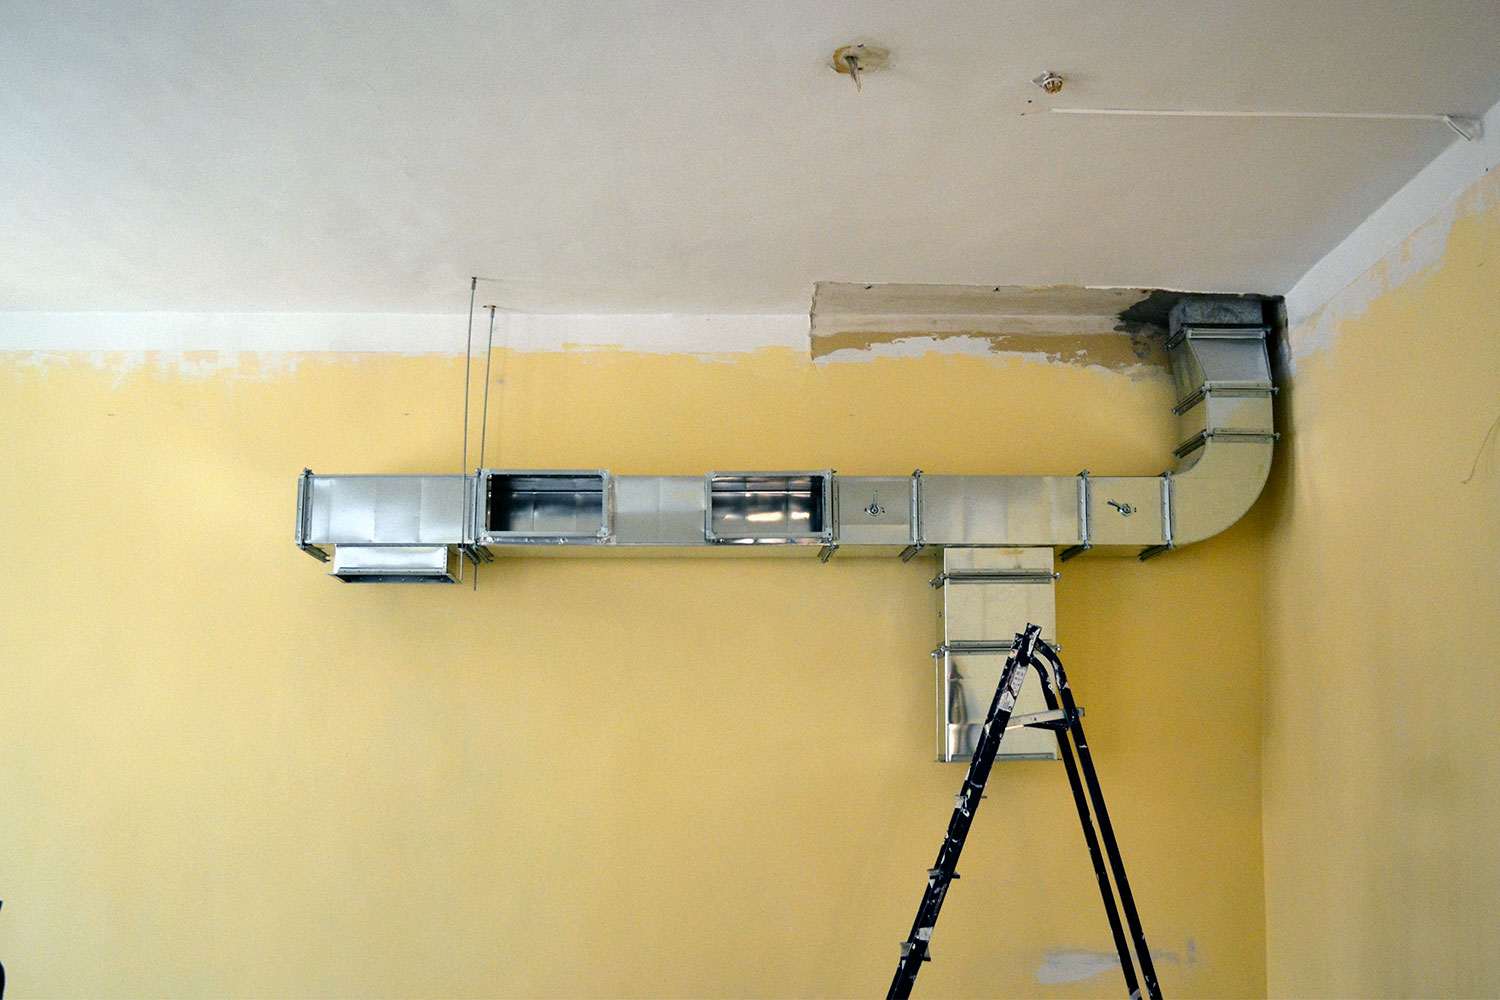
Монтаж приточно-вытяжной системы
Теперь непосредственно к монтажу. Безусловно, довольно не дурственно, если строители при литье или кладке стен подвала или погреба заранее позаботились об организации отверстий для вентиляции.
Бурение отверстий для вентиляции погреба
Но бывает и так, что никто об этом не вспоминает вплоть до образования на стенах плесени и грибка из-за постоянной влажности. Еще один вариант, часто встречающийся в старых домах – обычная дырка сквозь фундамент в подвал или погреб, закрытая дырявой железякой или вовсе без таковой.
Вентиляционное отверстие в фундаменте
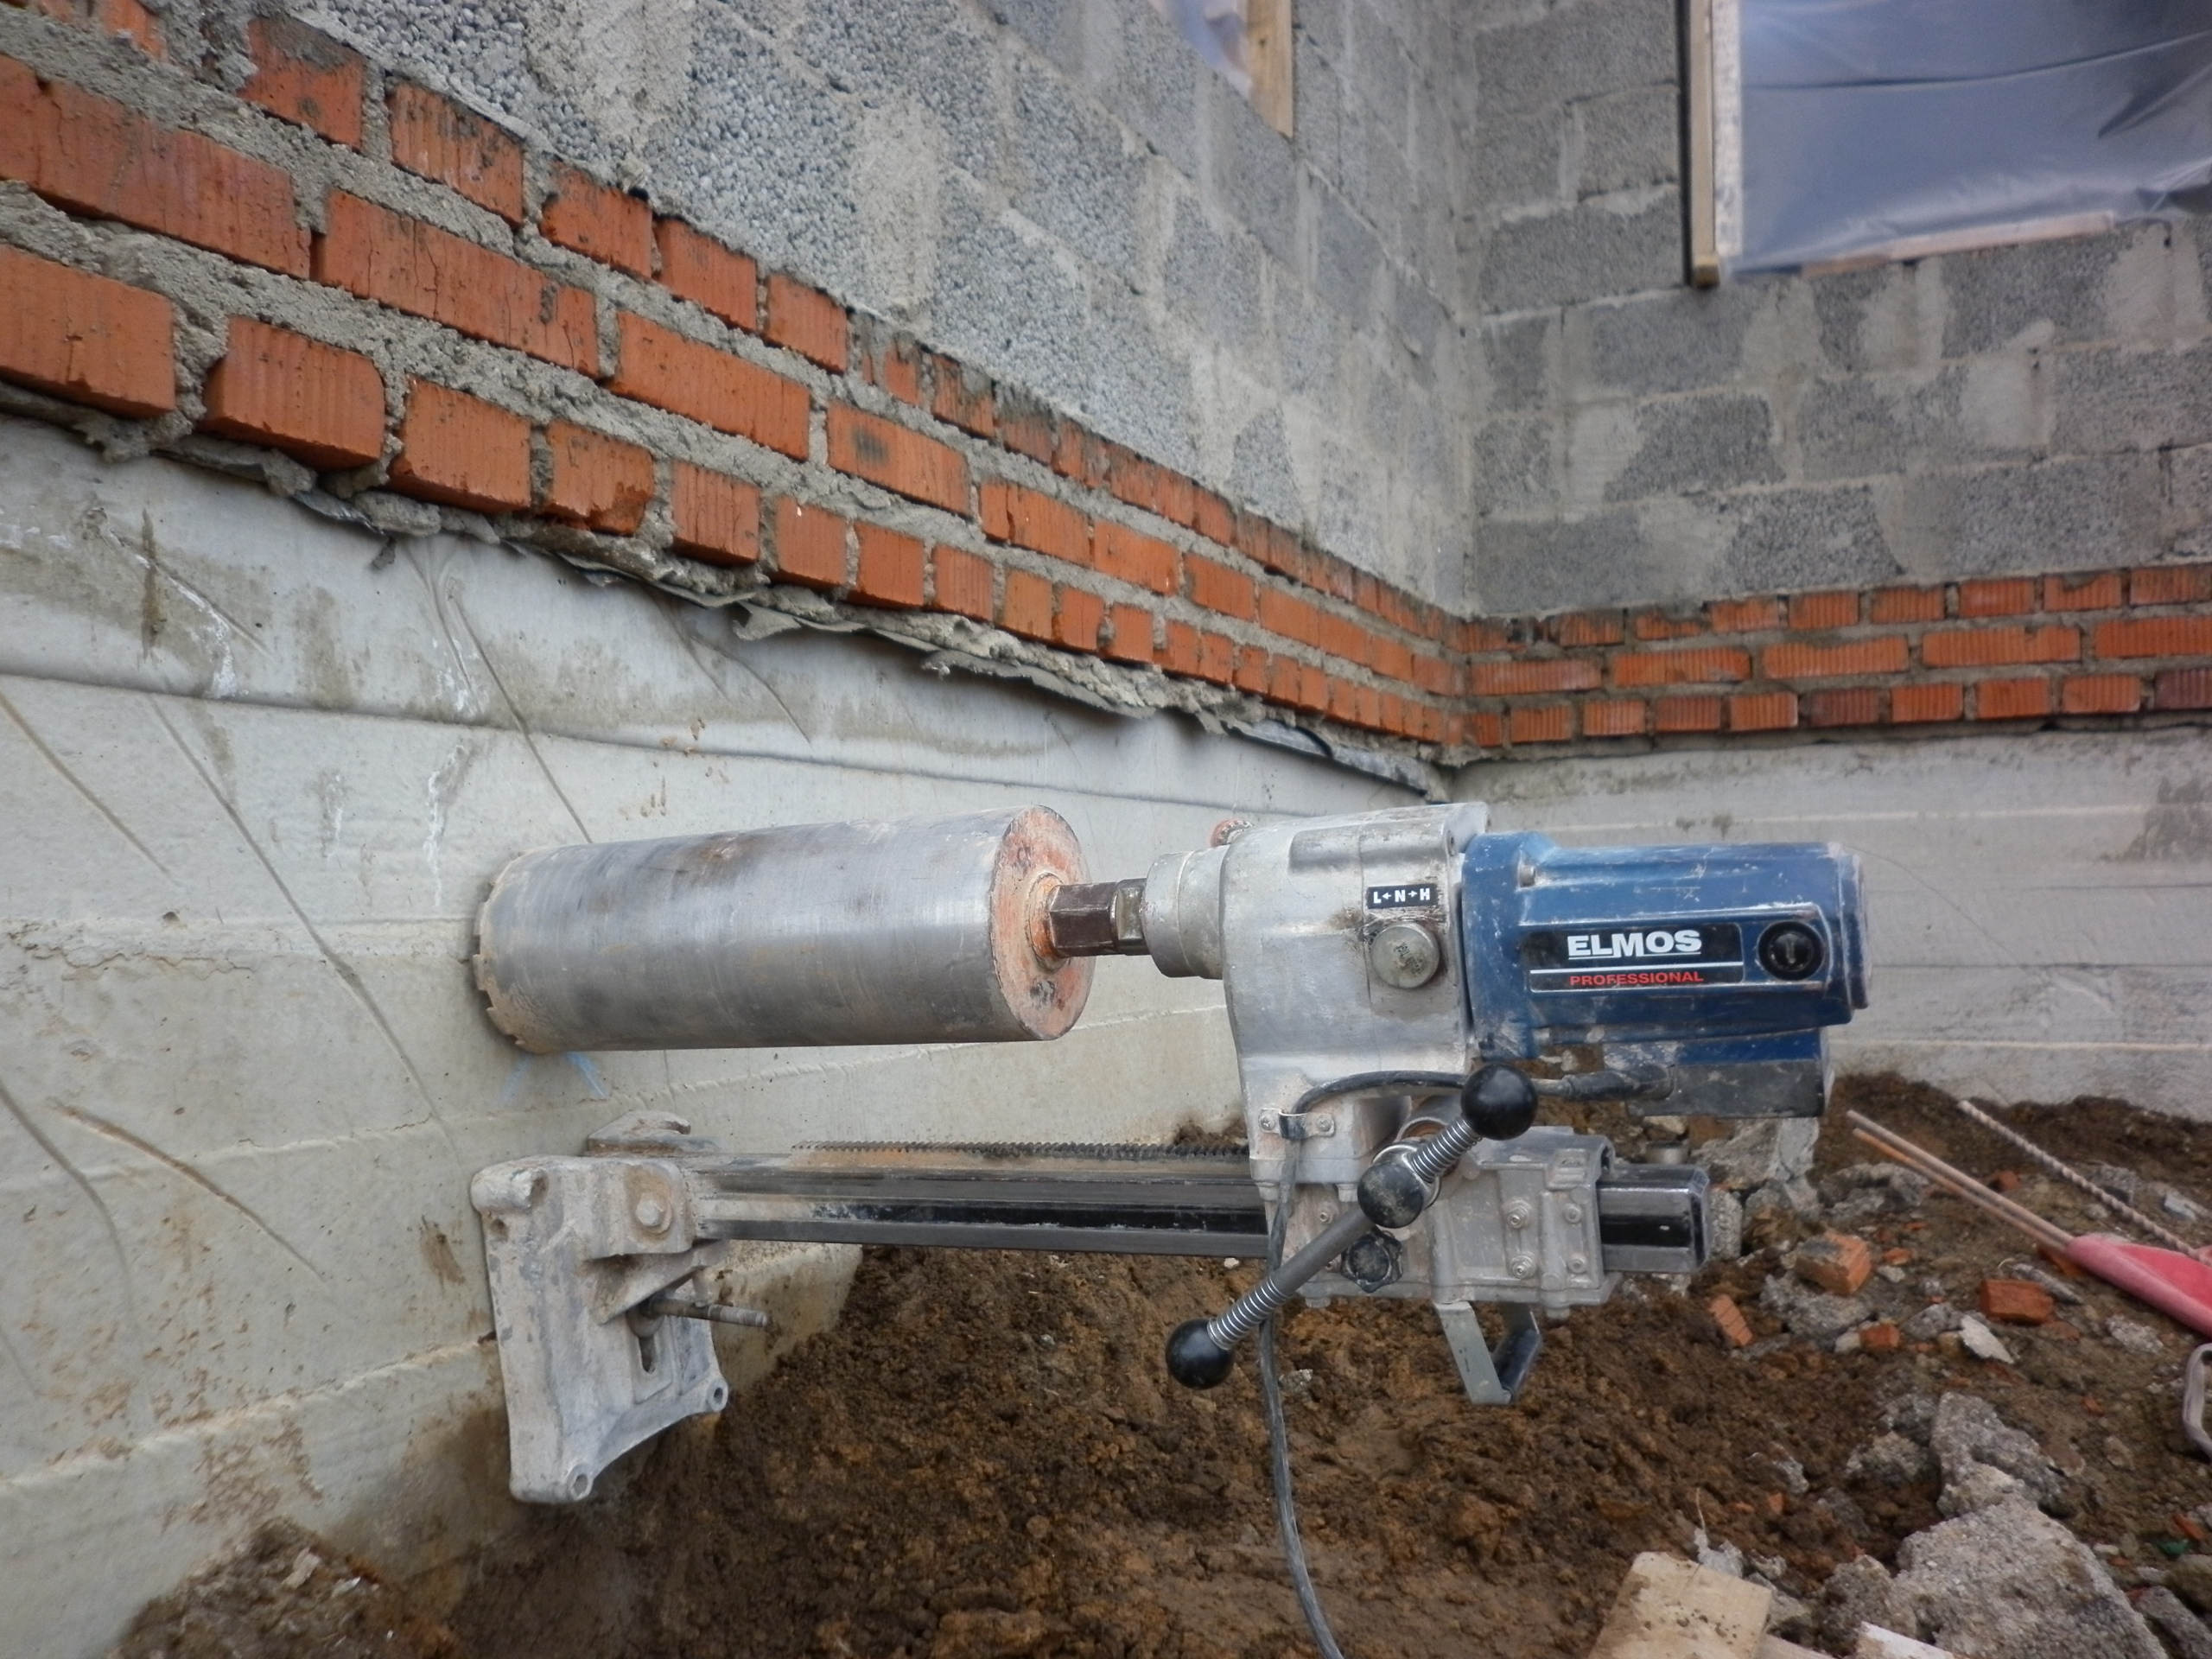
По мнению большинства горе-строителей, этого вполне достаточно для нормального проветривания. Вот в таких-то случаях и возникает необходимость брать перфоратор и своими руками делать отверстия в несущем монолите (а еще «интереснее» в бутовой фундаментной кладке) или перекрытии. Устройство подобных проемов – процедура не из приятных. Но…
С помощью специального оборудования можно просверлить отверстия даже в самых толстых фундаментах
Будем считать, что определившись с высотами и расположением отверстий, вы уже справились с этой нелегкой задачей, или строители при литье или кладке все продумали заранее. Вам остается лишь смонтировать систему вентиляции, вооружившись инструментом и материалами перечисленными выше.
Совет!
Лучше всего начинать монтаж с улицы.
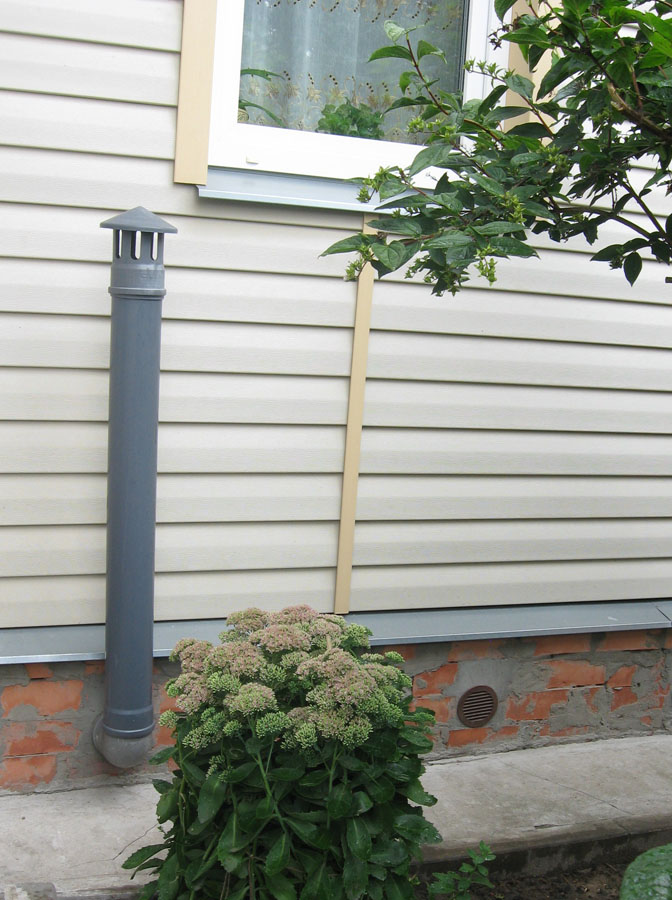
Запустив горизонтальный отвод сквозь стену подвала, насаживаем уголок для получения вертикали. Устанавливаем трубу в уже существующий уголок, получая таким образом выход, примерно 300-400 мм над уровнем земли. Запениваем пустоты между горизонтальным участком вентиляционной трубы и стеной подвала или погреба. Одеваем защитный «зонтик» из оцинковки на вертикальный участок, чтобы не попадала влага, и переходим к внутреннему монтажу. Там тоже все достаточно просто – ставим такой же уголок на горизонтальный участок, заходящий внутрь, и монтируем вертикальный опуск, используя кронштейны с зажимами. Нижний срез вертикального участка нашей вентиляционной трубы должен располагаться, как и было сказано выше, на 300-400 мм выше уровня пола. Согласитесь, своими руками это сделать достаточно просто. Поскольку устройство канала для подачи воздуха мы обеспечили, можно начинать монтаж отводной части вентиляционной системы.
Приточная труба вентиляционной системы погреба
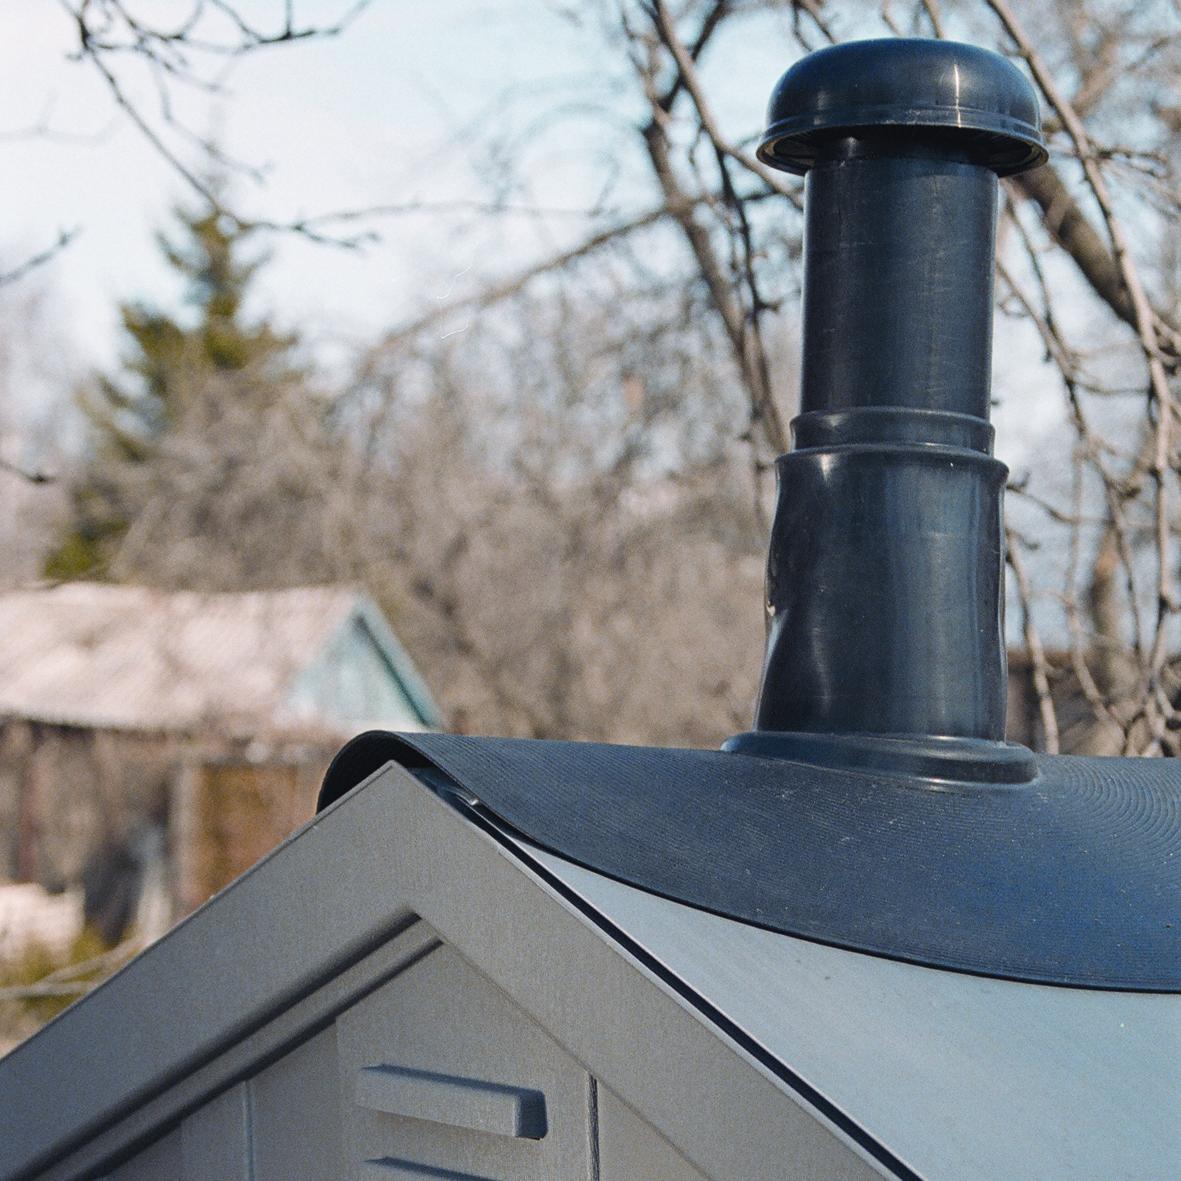
Принцип тот же, только на этот раз большая вертикаль выводится наружу с продолжением вверх (в идеале – выше уровня конька крыши на 500 мм). Перед тем, как ее установить, она утепляется с помощью минеральной ваты. Наружный слой может представлять собой оцинкованный короб или, что более просто, но не менее продуктивно, толстую рулонную фольгу, используемую при монтаже систем отопления и предотвращающую излишние теплопотери. Устройство теплоизоляции выводящей трубы вашей вентиляции может быть абсолютно любым, но главное – это эффективность. Если у вас имеется денежный излишек, можете использовать заводскую многослойную трубу, утепленную вспененным полиуретаном с оцинкованной защитой. Мы же рассматриваем, в основном, сугубо бюджетные варианты. Для крепежа к стене используются такие же зажимные кронштейны. Поверх трубы устанавливается оцинкованный «зонтик».
Выводящая труба вентиляции погреба
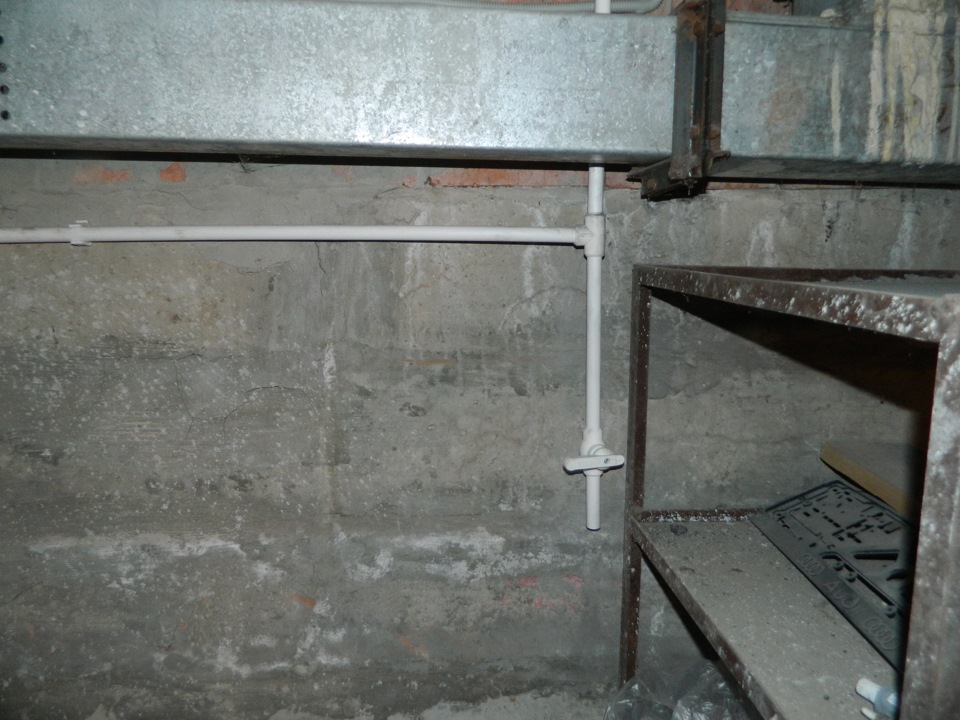
И немного подробнее о сборе и отводе конденсата. Внутренняя часть вытяжной трубы иногда снабжается отстойником. Он представляет собой тройник, сделанный, как правило, из той же оцинковки, с двумя полыми горизонтальными частями. Одна из этих частей монтируется на конец выходящей трубы и глухой вертикальной частью, направленной вниз, с вмонтированным в нее спусковым краном.
Спусковой кран для слива конденсата из вентиляции
Естественная вентиляция в подвале
Возможность принудительной вентиляции
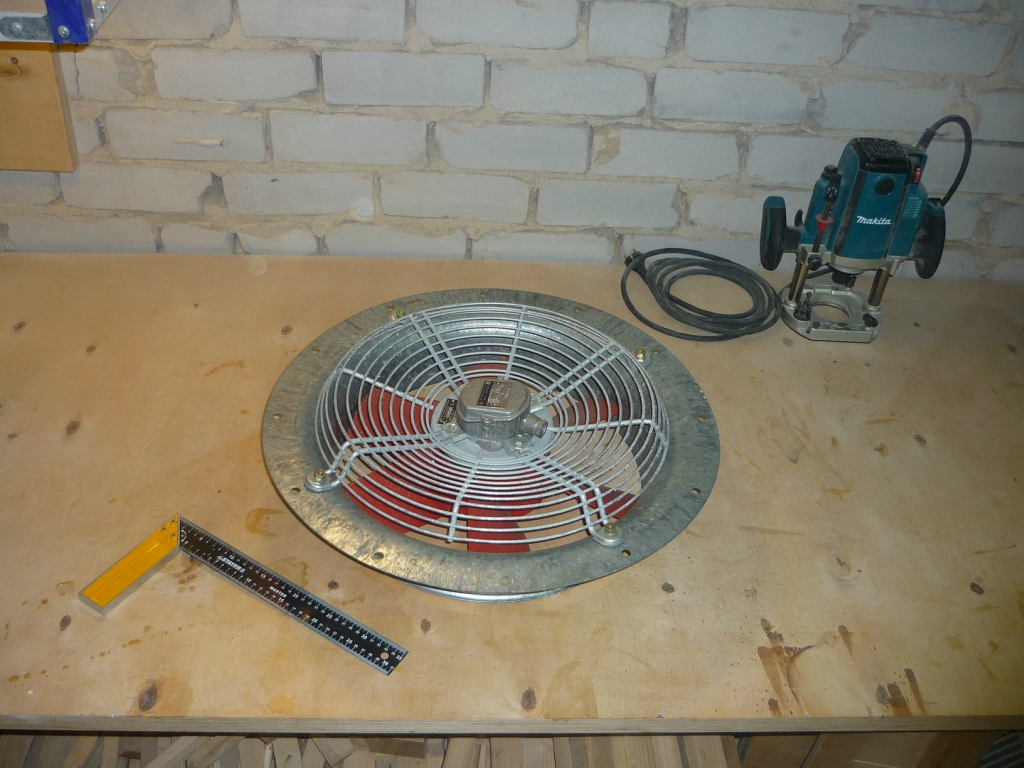
Если же вам так и не удалось достичь достаточной циркуляции воздуха в подвальном помещении даже после проведения столь изощренных манипуляций, не стоит особо расстраиваться. Можно призвать на помощь вездесущий технический прогресс и обеспечить ваш подвал или погреб принудительной системой вентиляции. И, конечно же, все это своими руками. Достаточно изготовить небольшой короб и поместить туда вентилятор для вытяжки. Стоит он не дорого и расходы ваши наверняка будут оправданы. Подключение к электрике не составит особого труда. Своими руками сделать это любому под силу. Только перед подключением не забудьте обесточить внутреннюю сеть во избежание встречи со святыми угодниками.
Вентилятор для принудительной вентиляции погреба
Вообще, вариантов расположения труб при такой схеме вентиляции достаточно много. К примеру, в гаражах, при наличии в них подвалов, вытяжная труба, как правило, проходит внутри помещения. В стареньком частном секторе, при наличии погреба, можем увидеть лишь две торчащие из земли трубы. В элитных домах можно часами разбираться в сложных схемах и удивляться изыскам буржуйской автоматики для систем вентиляции.
Вентиляционная система погреба
Что бы там ни было – главное, чтобы в вашем подвале или погребе было всегда сухо и светло. И своими руками сделать это вполне возможно, главное иметь немного трудолюбия и фантазии. Кстати, трудового энтузиазма вам вполне могут прибавить ваши домашние, которым рано или поздно надоест посещать темное и сырое подвальное помещение.
Принудительная вентиляция погреба
Как правильно сделать вытяжку в погребе
Люди, которые занимаются своим хозяйством знают, как много физических сил и времени это отнимает. Богатый урожай со своей земли хочется хранить бережно и долго, чтобы ничего не пропало, а титанический труд не прошёл даром. Такие люди задумываются, как сделать вытяжку в погребе своими руками. Это не затрачивает много сил и средств, а такая вещь как погреб очень пригодится в хозяйстве.
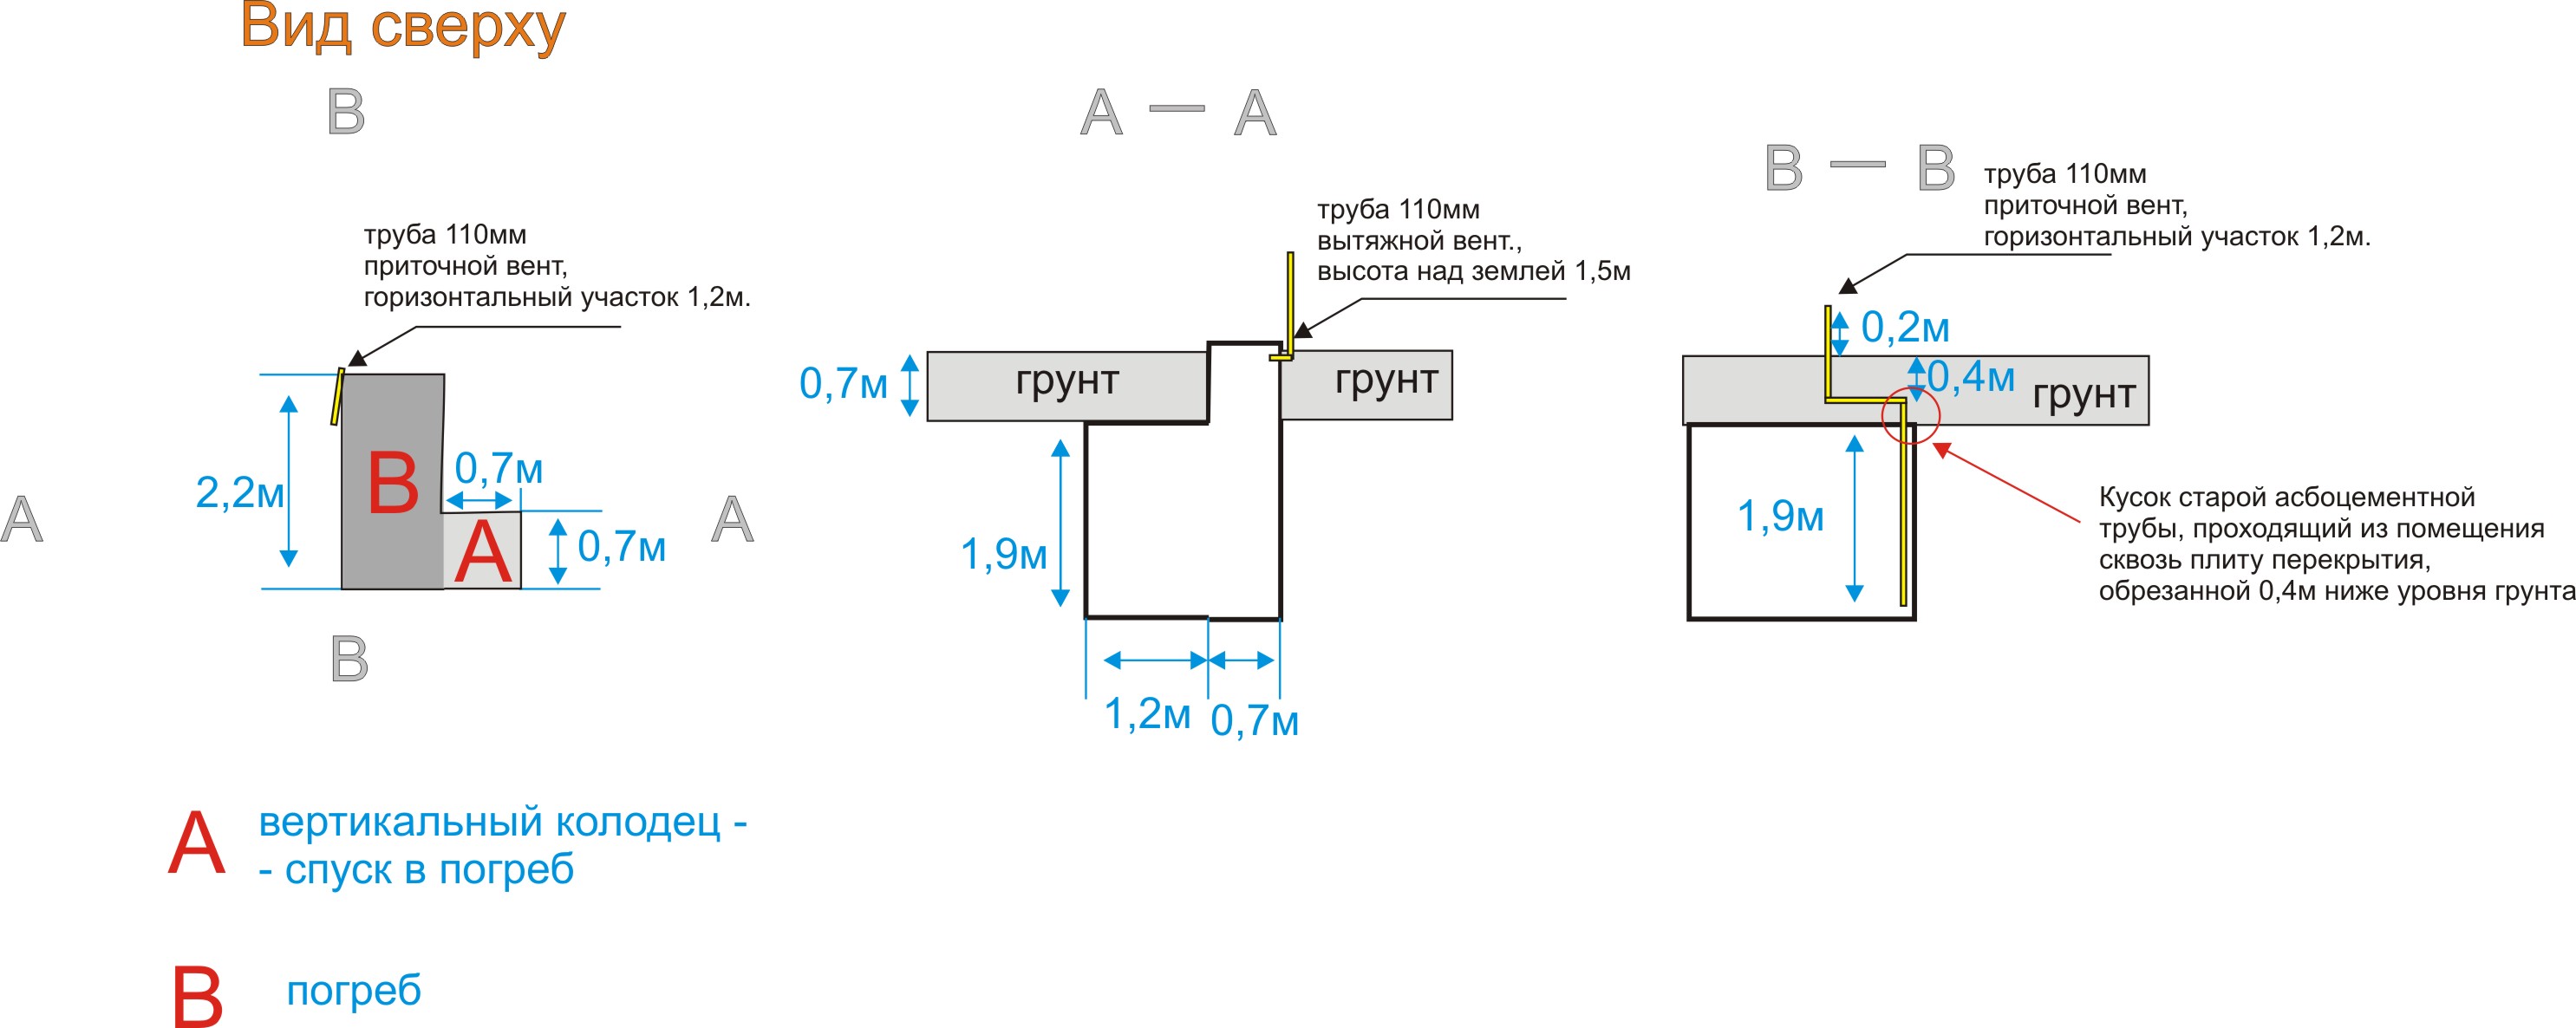
Схема вентиляции погреба
На самом деле, ничего в этом сложного нет. Главное что необходимо, чтобы чистый воздух попадал в погреб и выходил из него, создавая необходимую циркуляцию воздушных масс в замкнутом пространстве. Иначе, при сильной влажности помещения продукты будут гнить, возможно появление плесени, грибков и патогенных микроорганизмов.
Вентиляция погреба
Поэтому правильно работающая система вентиляции в вашем погребе предотвратит такие явления.
Расположение труб для эффективной вентиляции
Приточная труба должна ставиться так, чтобы её конец находился в расстоянии 20−30 сантиметров от пола погреба. Верхний конец трубы при этом находится на поверхности у основания грунта. Сильно высоко его поднимать не нужно. Важно, чтобы он располагался в проветриваемом месте и туда без труда попадал воздух.
Вытяжная труба обязательно ставится на другом конце погреба, нижняя часть трубы располагается наоборот наверху, 20 — 30 сантиметров над потолком и выходит на крышу. Важно, чтобы вытяжная труба была утеплена, так как на ней может образовываться конденсат, который увеличивает влажность в помещении. Такое расположение позволит держать потолок сухим. А расположение в разных концах помещения позволит проходить воздуху через весь погреб. Если установить вытяжную трубу ниже 30 см, потолок будет сырой и на нем образуется плесень или грибок.
Схема вентиляции погреба
Кроме этого, нужно отгородить трубы от проникновения влаги, насекомых, грызунов, птиц и прочего мусора который может через трубу попасть в погреб. Для этого конец придаточной и вытяжной трубы располагающихся на улицу закрывают решеткой.
По желанию вместо решетки можно использовать устройство, которое называется дефлектор. Дефлектор устанавливается на конец вытяжной трубы, выходящий на улицу и дает большую защиту от проникновения влаги в погреб, а при сильном ветре, благодаря давлению, из трубы будет быстрее выходить воздух, что будет способствовать усилению вентиляции в погребе.
О том, как правильно сделать вытяжку в погребе, нужно позаботиться ещё до начала строительства, чтобы избежать нежелательных ошибок.
Если все же вы делаете постройку с использованием двух труб, не располагайте их близко друг к другу, иначе воздух, проникающий из одного отверстия будет сразу же выходить из другого и вентиляция погреба будут минимальна. Обратите внимание, чтобы обе трубы были одинакового размера. Несоответствие может вызвать застой воздуха в помещении, что создаст идеальную атмосферу для гниения. Перед началом строительства у вас должна быть схема вентиляции погреба, чтобы заранее все просчитать, продумать и избежать ошибок.
Вентиляция погреба с одной трубой
Единственное условия которые необходимы для вентиляции одной трубой — это маленькая площадь погреба. Большое помещение не сможет проветриваться необходимым образом при наличии только одной трубы и начнутся проблемы.
Схема организации простой вентиляции погреба: в одну трубу встроены две
Для такой вентиляции берут трубу разделённую на два отсека, по которым — из одного оттенка воздух попадает внутрь, а из другого выходит. Крайне важно располагать вентиляцию в таком месте, чтобы она хорошо обдувалась ветром, иначе даже для маленького погреба одной трубы будет недостаточно. Поэтому необходима схема вытяжки в погребе, чтобы заранее во всем разобраться и измерить.
После установки вытяжки проверяется циркуляция воздуха. Например, можно задымить помещение и посмотреть как быстро очиститься воздух. Также можно приложить листки бумаги к разным концам трубы — один листок должен плотно прилегать, так как воздух через него выходит и он блокирует процесс, а другой листок наоборот, плотно прилегать не сможет.
Отдушка в погребе
Устройство вытяжки в погребе способно поддерживать оптимальную влажность воздуха (90%) и устранять повышенную влажность. Но если произошла такая ситуация, когда внутрь погреба попала вода и влажность повышена, необходимо это исправить.
Организация сбора конденсата в системе вентиляции погреба
Только одной вентиляцией тут ситуацию не спасёшь. Необходима правильная гидроизоляция стен и пола погреба. И по необходимости установить на трубе вентиляции резервуар с краном для сбора конденсата.
Для этого в погреб ставят ёмкости с веществами, способными впитывать влагу из воздуха — рис, соль (крупного помола), известь. Продаются даже специальные адсорбенты для таких целей. Если воды очень много, то необходимо вначале её откачать, а уже потом ставить адсорбенты для выведения остатков влаги в погребе.
Для контроля влажности воздуха установите спиртовой термометр. Так вы будете контролировать изменения влажности воздуха. А если погреб с большой площадью, поставьте два — на разных концах помещения.
Вытяжной вентилятор
Суть его установки заключается в том, чтобы принудительно усиливать вентиляцию в помещении. Вентилятор устанавливается внутри вытяжного канала. Таким образом усиливая выведение воздуха наружу и соответственно, усиливая поступление воздуха в придаточную трубу. Вытяжка для погреба должна быть эффективной и сохранять продукты свежими максимально долгое время.
Вытяжной вентилятор устанавливается в трубу по необходимости
Мощность вентилятора выбирают под размеры помещения. Слишком мощный вентилятор создаст слишком сильный сквозняк и сильно охладит продукты.
Можно установить два вентилятора в обе трубы, но для этого необходимо консультация специалиста, потому что у для больших и сложных в конструкции помещений нужно специально все рассчитать и продумать, чтобы вытяжка в погребе было максимально эффективной.
Как определить нужный диаметр трубы
При не сложной конструкции помещения возможно самому рассчитать необходимый диаметр для вентиляции погреба. Нужно знать, что для одного квадратного метра понадобится 26 квадратных сантиметров вентиляции.
Таким образом, площадь помещения умножаем на 26 квадратных сантиметров и получаем число, которое необходимо разделить на 3,14. Полученное в итоге число и есть нужный нам диаметр трубы.
Как смонтировать вытяжную трубу своими руками
Если сначала был сделан погреб, а только потом устанавливается устройство вытяжки в погребе, то для начала необходимо проделать отверстие соответствующего размера. После этого, установить трубу на необходимом расстоянии от потолка.
Герметично заделайте все зазоры труб вентиляции погреба
Убедиться, чтобы после установки вытяжки не оставалось лишнего пространства. Если так случилось — герметично заделайте зазор.
Если погреб строится под домом, то вытяжку можно установить в дымоход камина. Таким образом, разница в температуре будет увеличивать выход вентилируемого воздуха.
Если вытяжка выходит на улицу, то она должна быть намного выше приточной трубы.
Какие трубы применяют для вентиляции погреба
Сейчас имеется довольно большой сортимент вентиляционных труб, но чаще всего применяются асбоцементные или полиэтиленовые. Асбоцементные из — за состава намного тяжелее полиэтиленовых, но и те и другие одинаково долговечные. При установке полиэтиленовых труб возможно понадобится их сварить, это может получиться не у всех. Поэтому чаще всего для установки полиэтиленовых труб приглашают специалиста, который сделает эту работу.
При возникновении вопроса — «как же самому сделать вытяжку в погребе» нет ничего сложного. Это довольно просто сделать своими руками минимально затрачивая средства и время. Правильная вытяжка в погребе поможет продуктам храниться долго и радовать вас на столе.
Устройство вентиляции в погребе с двумя трубами: схема, размеры, фото Наверх Перепланировки
Каталог домов
С чего начать ремонт
О проекте
Реклама
Контакты
Facebook
Vkontakte
Odnoklassniki
Instagram
Pinterest
Дизайн и декор